

My current project is a lot of fun. I am making shelving and cabinetry for a walk-in master closet. The fun part is in the finish. My client has chosen to have the work done in pine, with a rustic, old barn look. The wood will look old, and worn; but it will not be rough, it will be smooth to the touch.
The material is common, knotty pine as may be gotten at most lumber yards. It is used so often in inferior work that most people would not often consider it for custom cabinetry. In fact I rarely work with it, so it was nice to smell that sweet pine scent in my shop again.
Here are some photos to show the process of creating the effects of age on new wood.
Using Gravel as a Tool
There are many techniques and different tools people use to “distress” the wood to simulate age. I found out years ago that when you use chains and hammers to do this that you have to take a lot of care to make it look right. It is not easy to simulate the marks of random events in such a mechanical and contrived way, Patterns will show up because you are making the marks all pretty much the same way. This is not what many years of wear and tear in the real world do when wood ages naturally.
Right out of the gate the process I use for making a rustic pine finish is different from what I normally do in other work.
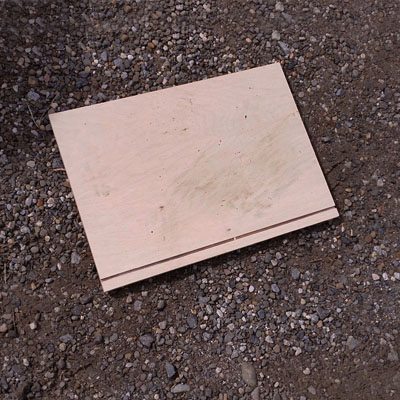
The first thing I do is take the wood outside to where I park my truck. I throw it on the ground, walk on it, use it like a skateboard and maybe jump up and down a little. It takes a different mindset from how I usually handle the wood when I am making cabinets. Normally, deep scratches across the grain are a bad thing. But now I want to create a complex and interesting texture that conjures many decades of use, and perhaps at times rough use. But still all the surfaces are to be friendly to the touch and have a nice finish. So I guess you could say it shows hard, but loving use.

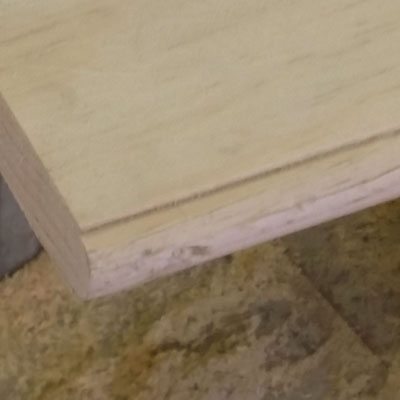
Creating a Century of Wear and Tear Quickly
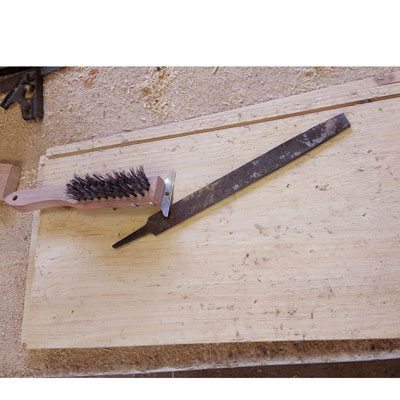
Step one shown above where I dance around on the wood out in the gravel will leave some deep and some not so deep scratches and dents on the wood. I am basically giving the wood many years of hard knocks, and careless bangs. The wood is in a very rough state at this point. So now I will do a little more. I take a file and jab at the wood with both ends of the file at different angles, drag the corners of the file down and even across the grain some to make more and different kinds of marks. Pretty rough stuff. If you have been a diligent and careful craftsman for many years you have to prepare yourself mentally for this or you will cringe at the process. But I am laying the ground work, and the goal now is to create a lot of random marks.
In the next step I will texture it a little more and start to smooth away some of the rougher dents, and give the entire board a rough and grainy look. I will get rid of any gloss and machine marks that pine always has when it comes from the mill. The goal now is to start to wear away at the wood. The kind of wear that comes more from rubbing and sliding than from banging.
For this I start with a belt sander and a nice coarse 60 grid belt. It leaves uniform scratches that are a lot smaller than the gravel out in the parking lot.
A Variety of Tools To Wear Away the Wood
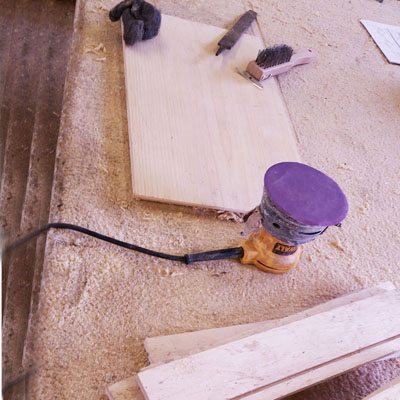
Now I start to refine things a little. In the next step I will wear away and smooth the wood. This is the more normal wear and tear that happens every single day, year after year to furniture, tools, and homes that are in constant use. surfaces get worn down and smoothed.
I vigorously scrub the board with a steel bristle brush, then coarse steel wool.
Next go over everything with a random orbit sander using medium (#120) grit stand paper. I bear down a little harder on corners to wear them down a bit.
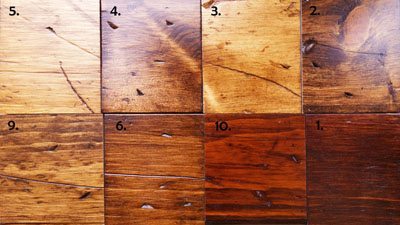
The Finished Look
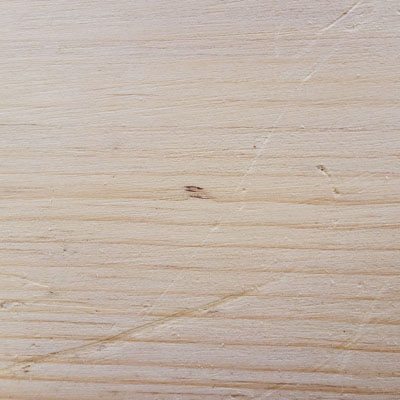
Here are some samples made from the pine. To get to this point is pretty much the normal finishing process. The wood has been textured and sanded already, it is given a coat of stain. You can see that more stain is absorbed into the scratches an dents than on the sanded surface of the wood. This gives the wood a variety of color intensity, similar to how it would look if it had a glaze applied.
After the stain has dried it is given a seal coat of finish, in this case lacquer.
Next it is scraped or sanded or rubbed down with fine steel wool.
If a glaze is desired I would do it now.
Then 3 more coats of lacquer to give a nice build on the finish.