Assembled section of a wood baseboard heater cover

How to Assemble and Install Your Wood Heater Cover

How to Assemble and Install Your Wood Heater Cover Assembled section of a wood baseboard heater cover

You can use the buttons above to download detailed Installation Instructions for your convenience

All of the Wood Baseboard Heater Covers from Sunrise Woodwork are designed to be easy to assemble and install with just a screw gun, or screwdriver.
We include a professional grade square tip driver bit with every order.
Each heater cover is assembled and checked before shipping to assure that everything is correct.The heater covers are disassembled for shipping, and need to be re-assembled by you in your home.

The heater covers are custom made in the exact size and configuration that  you need and your Wood Heater Cover  may be a single straight section on a single wall, or it may be several sections that wrap around corners on multiple walls.

For shipping purposes, long sections are made in segments up to 50″ long and joined together to make any length needed.

If you would like information about our Custom Wood Baseboard Heater Covers,
or how to Order
Click Here or visit http://sunrisewoodwork.com/product/custom-baseboard-heater-covers/

THESE WOOD HEATER COVERS ARE DESIGNED FOR HOT WATER HEAT SYSTEMS, AND ARE NOT INTENDED FOR ELECTRIC BASEBOARD HEATERS.

Tools needed to install Wood Baseboard Heater Covers
Assembled section of a wood baseboard heater cover
Assembled Section of a Wood Baseboard Heater Cover

1. Prepare Existing Metal Cover

Typical Metal Baseboard Heater Cover
Leave only the Backplate

It is best to prepare to install your new wood baseboard heater cover by removing the end caps and the front panel from your existing metal cover. These parts will pull off easily. It is suggested to wear light work gloves for this step as the metal parts can have sharp edges.
Leave the back plate attached to the wall.

2. Lay Out the Parts

Long Heater Covers will have multiple segments.

Lay out the parts for your heater cover in front of the wall where they will be installed.
A cover may be a short, straight heater cover in a hall or bath, or it may have several sections that join together to make a long Heater Cover, perhaps it even wraps around corners.

All covers have a top frame and a front panel, and may also have end caps and possibly one or more joiner caps (between the segments of a heater cover).

Segments Laid Out and Ready to Join together

For shipping purposes the  top frames and front panels are made in segments up to 50″ long.

For any wall /section longer than 50″, 2 or more segments  will be joined together to make any length required.

It is suggested that you  lay a blanket or something soft down on the floor first to protect the heater cover from scratches.
Each segment is labeled with the wall it belongs on, multiple segments are lettered from left to right  (i.e. “Wall 2-A”, “Wall 2-B” etc.) when laid out on the floor with their back side facing up as shown in the photo.

Each order comes with a #2 square drive bit to drive the screws used to join the pieces. This bit can be mounted in a drill or screw gun (recommended) or into a suitable screwdriver handle. If you use a drill or screw gun with an adjustment for torque, set the torque around half strength or lower to begin. This will help avoid over tightening the screws. Although a  screw gun is easier and faster to use, a hand turned screwdriver offers excellent control and is adequate to do the job. The screws will turn easily.
In any case take care not to over-tighten the screws, just make them snug.

If your heater cover is less than 50″ long Skip to step 4.

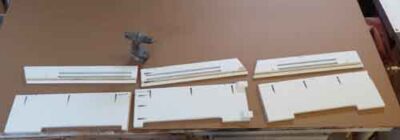
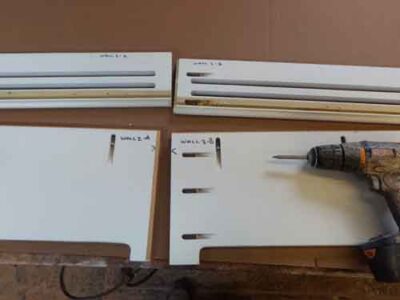
3. Assemble Top Frames & Front Panels

Interlock Joint
Interlock Joint
Push 2 Pieces Together
Secure 2 Pieces with Screws

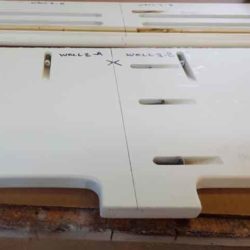
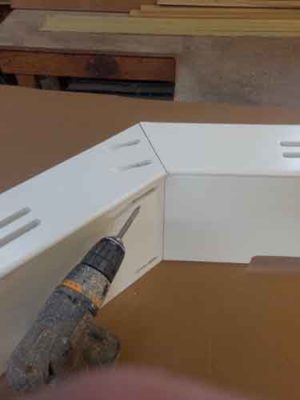
When multiple pieces or segments  are to be joined into a long section of heater cover, both the top frame and the front panel segments are made with an interlocking pattern to make lining up the parts easy.
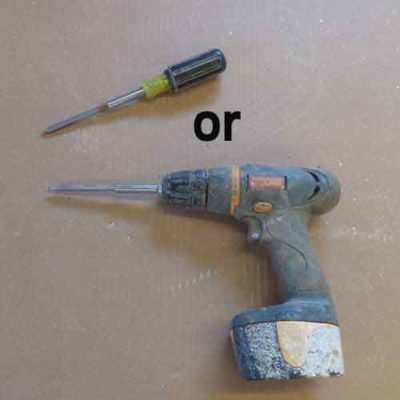
Simply push the 2 pieces firmly together, and tighten the 1-1/2″screws gently.
Assemble any remaining segments of top frames or front panels into their full sections the same way.

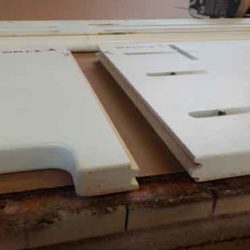
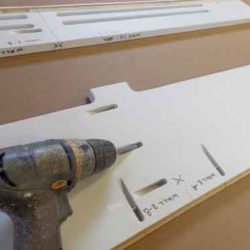
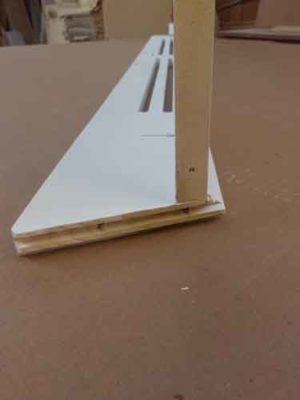
4. Attach the Top Frame to the Front Panel

Joining Top Frame & Front Panel

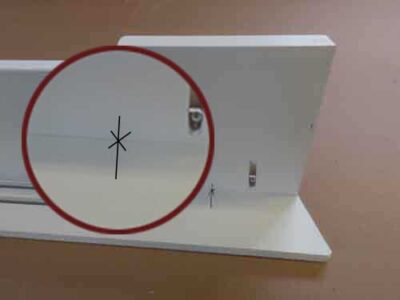
Line up the arrows on the top frame and the front panel.

Front Panels have a Tongue

Insert the tongue on the front panel into the slot in the top frame, and press the pieces together.
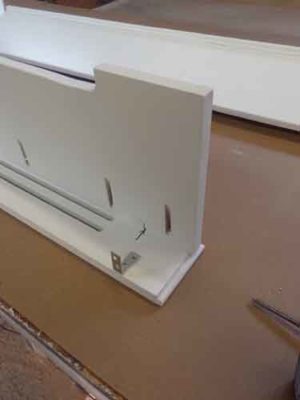
Using 1-1/4″ Screws
Fasten the Top Frame to the Front Panel.

Insert the tongue into the groove
Screw the Frame & Panel together

Important Tip!

When assembling large covers, and covers that wrap around a corner, it is much easier to eliminate this step, and not attach the top pieces to the fronts before installing them on the wall.

Simply assemble all the front pieces together, and set them in place. Assemble all the top pieces to each other, screw on the metal “L” brackets as detailed in the next step.
Then, starting in the corner if there is one, or at one end, align the groove on the top piece to the tongue on the front piece and tap the top piece downward with the edge of your hand to seat it in place. The pieces will stay together fine, and you will make the job much easier.

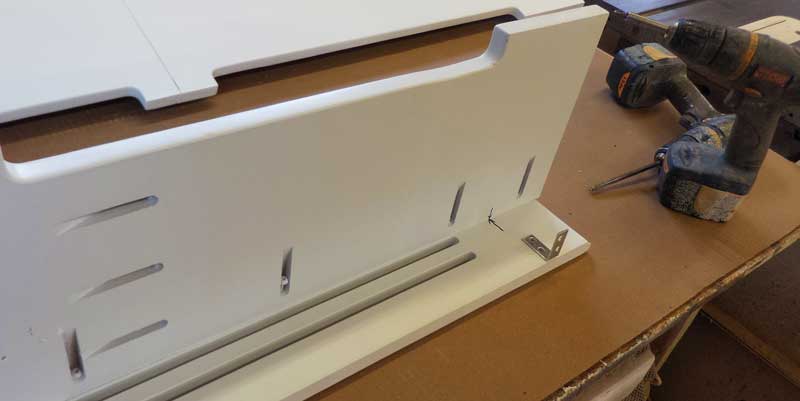
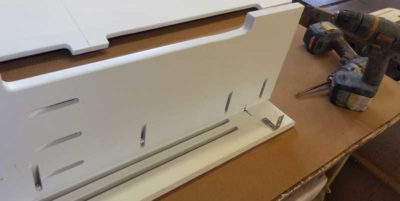
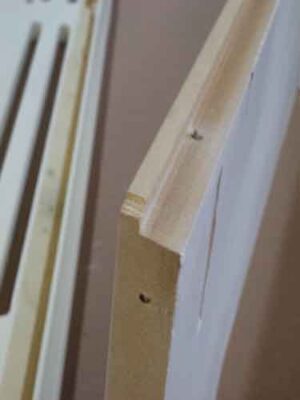
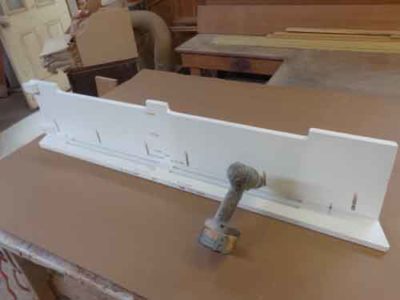
5. Attach "L" Bracket Mounting Clips

Screw Mounting Clips to Top Frame

Screw “L” Bracket mounting clips onto both ends of all top frames.
Align the  back edge of the mounting clip to back edge of the Top Frame.
Use 5/8″ long screws to secure the mounting clips
The bottom of the clip will slide behind the back of the metal cover and hold the new wood cover in place.

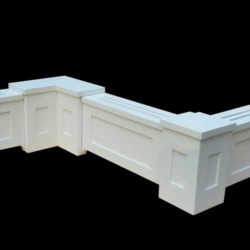
Repeat the steps to assemble all the wall sections needed for your heater cover.

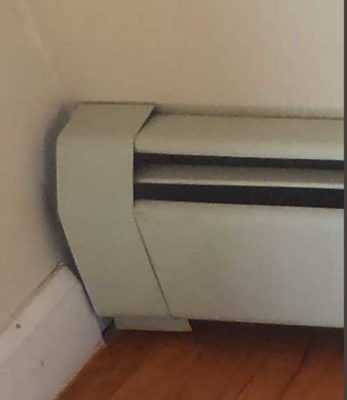
6. Join the Sections Together

Screw the Corners Together

Slide each section into place on its appropriate wall. Slip the bottom of the mounting clip over the back plate of the existing metal heater cover.
Push the cover down until its feet touch the floor.

If your Heater Cover has more than 1 section which wraps a corner,
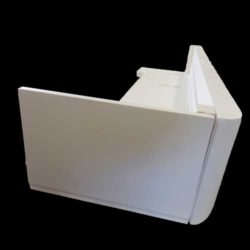
 Line up the corners of each section and screw them together using 1-1/2” Screws.

7. The End Caps

Joiner Cap Paneled Heater Cover
Joiner Cap for Paneled Heater Cover

The ends of the Heater Cover are treated differently depending on the style of the cover and the layout of the walls. Your  Heater Cover may have end caps that look different than those in the photos. Your Heater Cover may have corner caps and one or more joiner caps.

The caps for the Paneled Heater Cover slide into place easily and are held on with special low profile hook & loop fasteners that make it a breeze to remove the caps if necessary. The end caps can be moved side to side to help fit closer to your wall or base board moulding.
Test fit the cap so you are sure where you want it placed.
Then peel off the plastic film from the hook & loop fastener that is already on inside of the cap.
Slide the cap in place, and push to make sure the adhesive on the fastener bonds to the front of the heater cover.

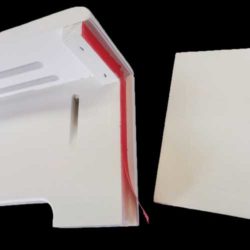
The Ogee Top Heater Cover and the Round Top Heater Cover have no end cap if the Heater cover meets a wall (open end)
and will have a simple 1/4″ thick end cap panel that is attached to the end of the Heater Cover if the Heater Cover has a closed or finished end. Simply peel the red plastic strip off the double sided tape that is attached to the end of the heater cover and press the end cap in place.
Hint: the point of a knife will help in peeling off the red plastic strip. Do not allow dust or dirt onto the adhesive tape after you pull off the red strip.

Easy – Peasy!

Attaching the End Panel for Round Top Heater Cover
The End Cap for a Round Top Heater Cover
Corner Caps for Paneled Heater Covers

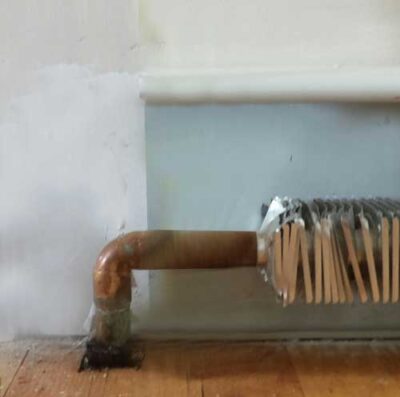
8. Step Back and Admire Your Work

You are done!
Step back and enjoy how beautiful your heater is now.

It is normal for there to be some small amount of odor from the paint or lacquer for a day or so.
It will dissipate quickly as the paint cures.

I hope you had a pleasant time assembling and installing your new wood heater cover, and that you will enjoy the beauty it brings to your home for years to come .

If you have any questions or any difficulty, please contact me and I will guide you through any issue that may arise.
You may find it convenient to use the “Get More Information” form at the bottom of the order page for the wood baseboard heater covers.

Also, I welcome  your comments

8 thoughts on “How to Assemble and Install Your Wood Heater Cover

  1. mary ellen

    I LOVE these! Do you know of anyone in the bergen county (No. Jersey area) That coud install these!

    Reply
    1. tom Post author

      Hi Mary Ellen,
      Thanks for letting me know how much you love my heater covers.
      These heater covers are easy to install. Most of the time my customers are homeowners who install them themselves. But, you are in luck. Bergen county, NJ is not too far from me, so I can install them myself if you like. In addition I can offer you options not available online, such as integrating the heater covers into your existing baseboard moulding.
      I would be happy to come to your home to measure and discuss your options. contact me or call me at 845.987.0580 and we can arrange a time to meet.
      Tom Andreas – Sunrise Woodwork

      Reply
  2. R. Joncas

    Just installed four units one double sized. All went together as explained and they look absolutely great.

    Reply
  3. charlotte Abramowitz

    I LOVE these! Do you know of anyone in Suffolk County in Long Island that can installed these for me.

    Reply
    1. tom Post author

      Hi Charlotte,
      I am very happy you love my wood heater covers, I have worked very hard to make them the nicest looking heater covers you can find anywhere.
      I am sorry to say that I do not know anyone to help you install them in Suffolk county, NY.

      But I will add 2 things:
      First, they are not difficult to install yourself. Most of my customers install them on their own.
      If you have a house full, or if they are very large they can be a little more of a challenge though.
      Second, the best way to find someone local who can install them is to look for a good trim carpenter.
      You can do a search online, or ask at a local lumber yard for recommendations. If you find someone you want to use I will be glad to speak with them and coordinate the job.
      Best of luck in your search, I hope to hear from you again.

      tom andreas

      Reply
  4. Michael

    After assembly and all screwed together, especially long wall sections. How do get to the heater element to clean ?

    Also let’s say my wall is 13 ft long. Do you break the segments equally? Not going over 50″ I assume.

    Reply
  5. Tom Andreas

    Hi Michael,
    When doing long sections, or sections that wrap multiple walls it is best to follow the tip in my installation instructions that advise not to screw the tops and fronts together, but instead to just seat the top onto the front. It will stay in place because of the tongue and groove setup. This will not only make the install much easier, but will allow easy access inside later on. Simply lift the top up.
    the sections of the heater cover are not always equal in length. I build them so that the vent slots on top are of equal length on a wall, but the sections overall may vary according to the layout of the walls. for example, a section that meets an inside or outside corner will be longer than the one next to it. They are usually 50″ and under, sometimes they may be a couple of inches longer.

    Reply

Leave a Reply

Your email address will not be published. Required fields are marked *